Showing posts with label Naval Wargaming. Show all posts

Monday, 24 October 2022

Gaming in Oct 2022

  • 16 Oct - The Beast of Errinsford (OSE) - face-to-face
  • 21 Oct - Trafalgar Day game - Blood, Bilge and Iron Balls - solo wargaming


The Beast of Errinsford


The group at our LFGS that I DM for are currently playing The Beast of Errinsford, loosely based on the module The Black Wyrm of Brandonsford by Chance Dudinack. 

  • 16 Oct
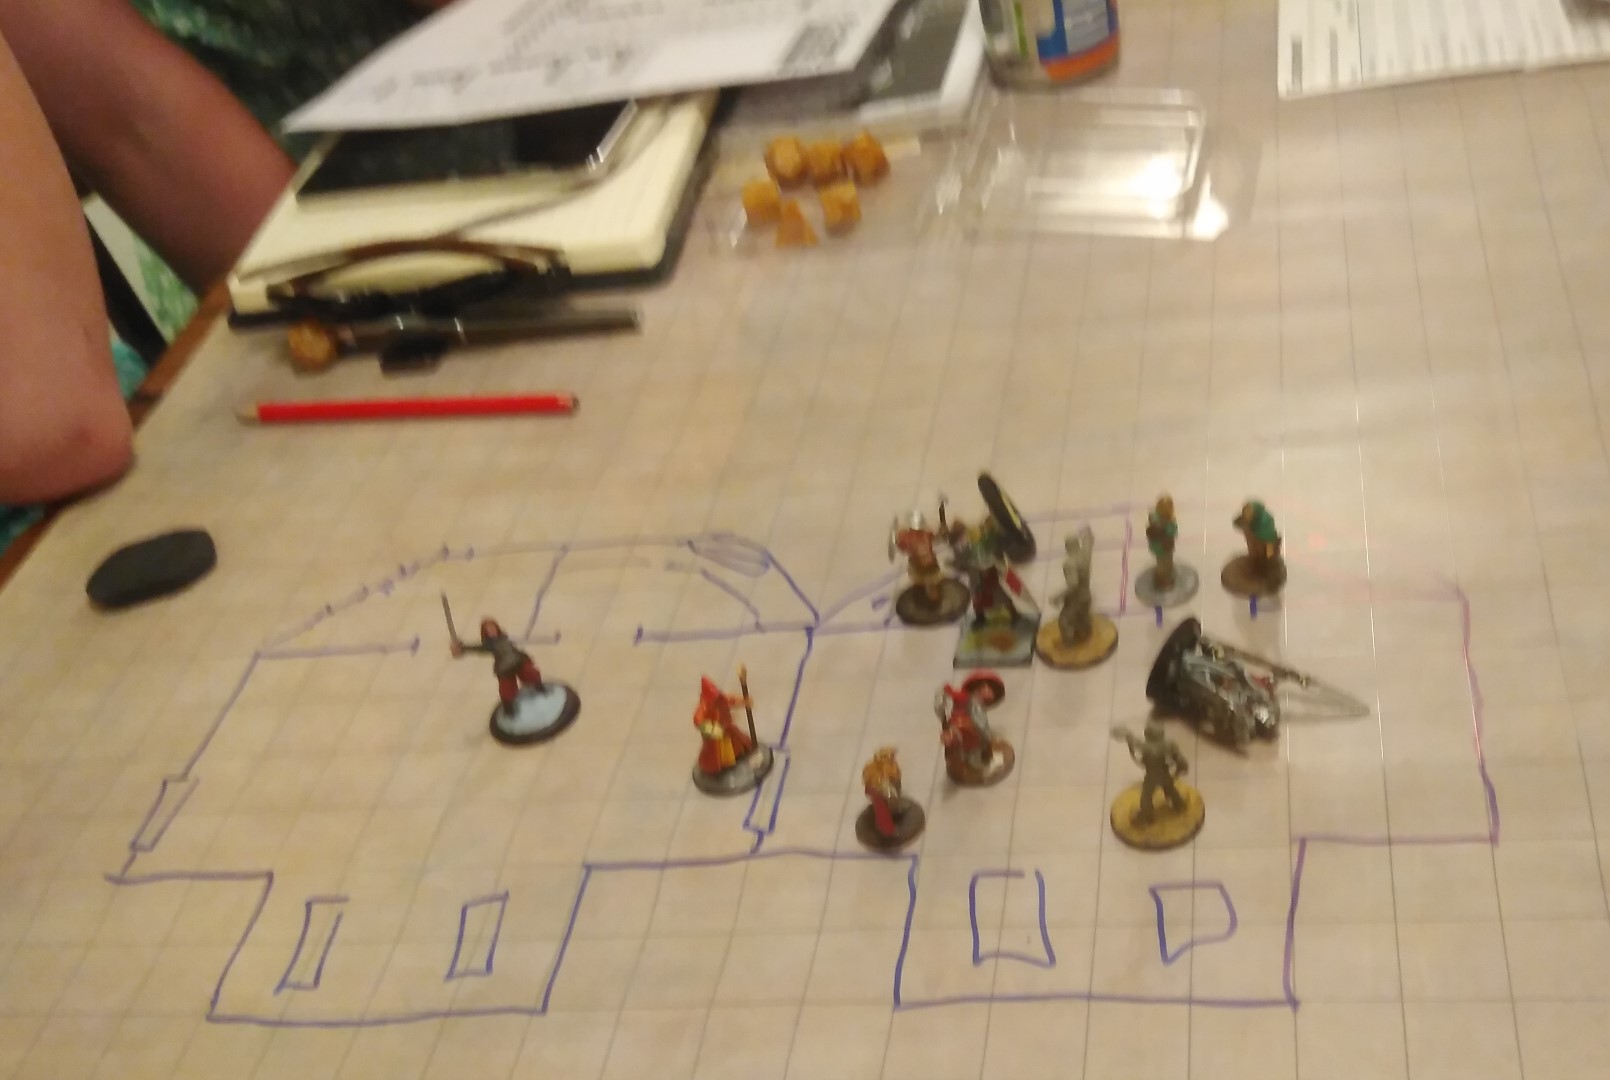
A depleted party carried on with their side-mission of looting collecting magical weapons from the tomb of Sir Errin and his companions.  They had a brief encounter in the marshes with Bullywugs Gullygugs, but managed to pay a toll with a mirror and a toy clay pig.


They got to the barrow, met the sole survivor of another group of looters explorers who (surprisingly, seeing that he was a Goatman, they didn't kill and defile on the spot).  There then followed a surprisingly careful and efficient sweep of the barrow, in which they defeated miscellaneous pests (fricassee of rat) and mollified the undead souls of the ancient heroes.  One of the party - Gimli the Elf - was killed by a giant spider.  There only being two surviving PCs, an unfeasible amount of XP was awarded for the masses of treasure they recovered.


Blood, Bilge and Iron Balls

  • 21 Oct - Trafalgar Day

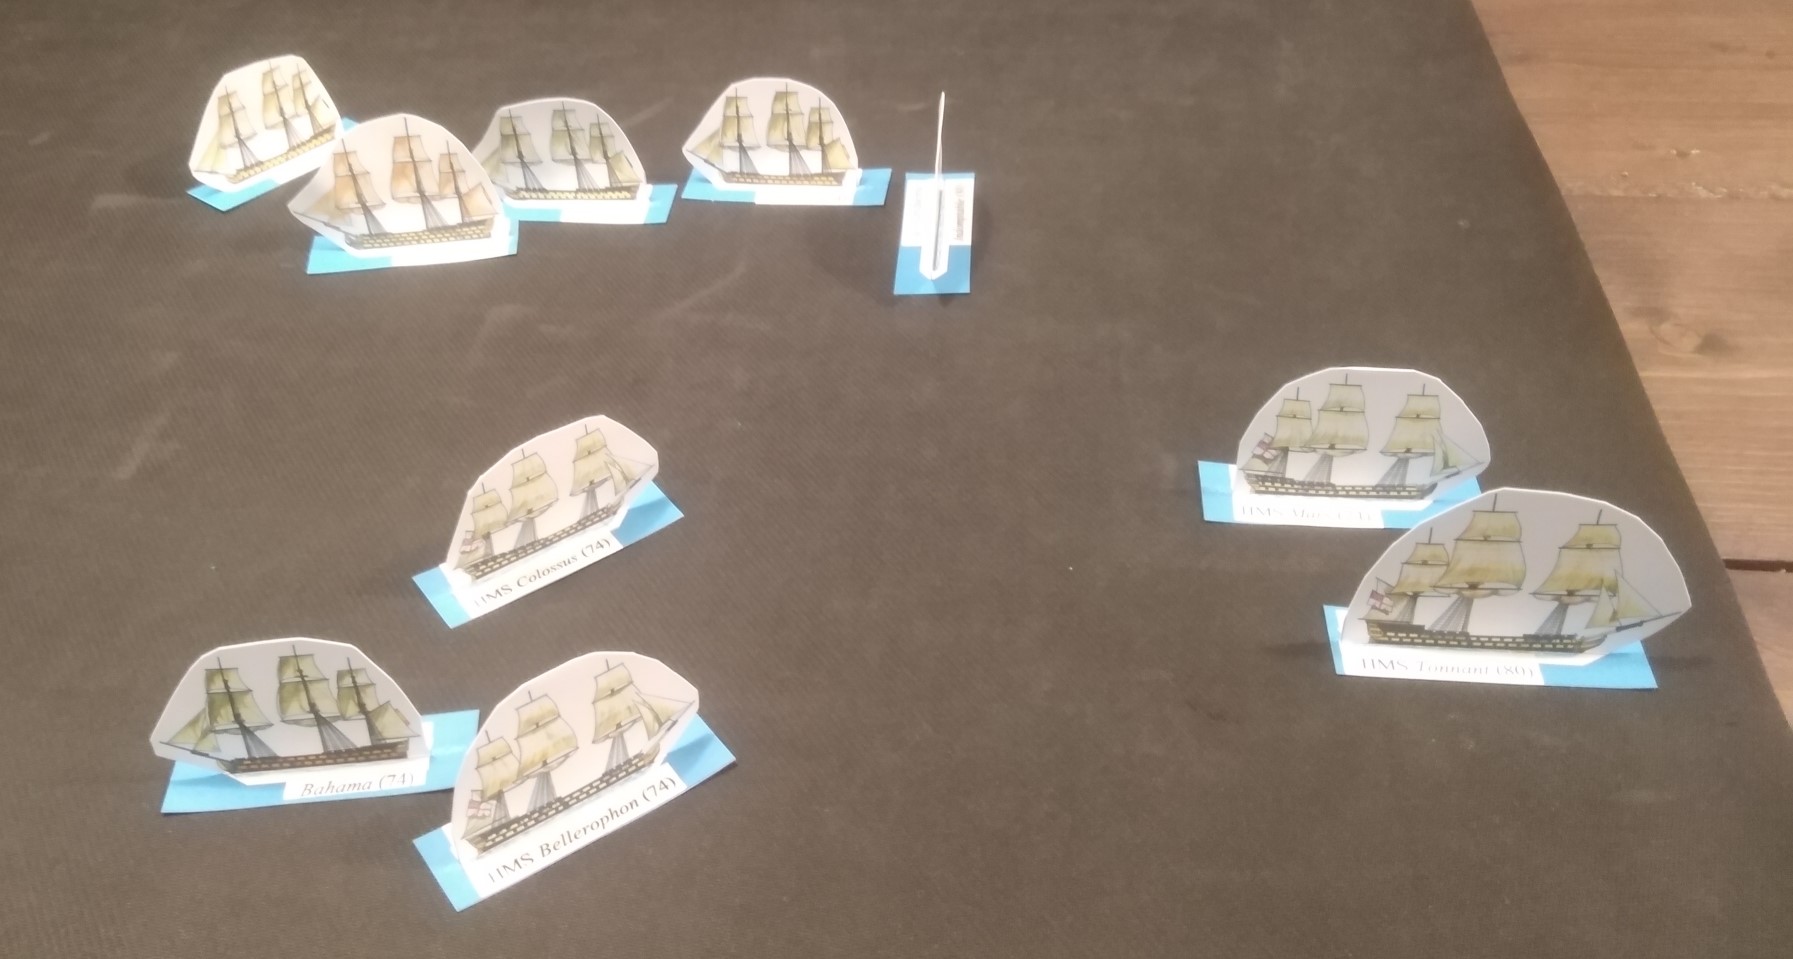
As it was Trafalgar Day, I had of course to have a go at the battle itself.  I used Collingwood's leeward column as the set-up for a solo game using the BBIB rules.

Inevitably, the British fleet suffered heavily on the approach to the Combined line.  It didn't break the line, as the Combined Fleet decided to break and move into melee sooner rather than later (not having to worry about the bigger picture of the battle).  It soon became rather messy and, when I called it after almost four hours of play, It was a British defeat.  

I still have a lot to learn about age of sail tactics and placing ships where they can be most effective.

BBIB has served well for what I wanted it for - an intro to naval wargaming.  It lacks nuance though, and I'm wondering whether to move on to something with a bit more granularity - possibly the Two Fat Lardies Kiss Me Hardy.

Saturday, 22 October 2022

Trafalgar Day 2022 Game

'HMS Royal Sovereign First Through The Line'
by Richard Grenville

 As part of my on-going attempts at solo naval wargaming, I had to mark Trafalgar Day by having a go at part of the battle.  I accordingly booked a suitably-sized table at my local friendly gaming store and broke out Blood, Bilge and Iron Balls again.

Only being human, I couldn't manage the whole battle, but instead played out the attack by Admiral Collingwood's leeward line.  Fortunately, the scenario has been laid out in a free download from Warlord Games.  

In reality, the line wasn't this neat, and
instead was in effect a line of bearing

Turn One


Of course, things started out as in the real engagement.  Collingwood's line, headed by HMS Royal Sovereign, the flagship, raced towards the centre of the Franco-Spanish line.  During this time, they suffered from the combined fire of the line-of-battle.

I made the mistake of not having the British approach under full sail - that would have allowed them to engage sooner and left Bellerophon and Colossus under-utilised in the rear.  In each of these games I learn something new: today's lesson was on effective deployment.

Turn Two


I'd decided to ignore the rest of the battle, so had no compulsion in having the Combined Fleet decide to break the larger formation.  Initially, I thought they would turn in succession at the flagship's position (San Ana in the van)  and run (into the wind!) parallel to the British attack.

In the first departure from history, Royal Sovereign and Belleisle attempted to break the line between Fougueux and Pluton instead of going for San Ana.  The rest of line headed for the gap between Pluton and Algesiras.  By accident, this meant that the Spanish Monarco was in position to rake Royal Sovereign's bows.  


I now realised that turning the Combined line in succession would take too much time (Cape St Vincent anyone?), and instead chose to tack together.  This had the effect of breaking formation and losing the effect of over-lapping fire that line-of-battle is designed to give.


At this stage the British hadn't yet opened fire, but had already suffered 33 hits, including the raking of Royal Sovereign.  It was now in position to fight back, but Royal Sovereign and Belleisle (in the van) were constrained by the command-and-control damage they had suffered (though Royal Sovereign was still able to engage on both sides).  Nevertheless, the single hit on Pluton from Royal Sovereign caused an inferno.

Turn 3


Things got very messy from here on.  The van of the Combined line attempted to wear round and reverse direction, the rest of their line was now heading into the wind.

Bahama suffered major damage (having drawn both jokers among its damage card).  Algesiras rammed Belleisle with the intent to board, but the boarding party was repulsed.  Bellisle turned the tables and moved to board Algesiras.

Turn 4

This now turned into a slugging match.  Ships from both sides found that the interlocked Algesiras/Belleisle their only viable target and decided that the damage to foe was worth damage to friend.  That, and Bellisle's boarding action was enough to force Algesiras to strike.  However, Belleisle was in left a very critical state.

Turn 5

Despite their lack of maneuverability, the Combined fleet remained in a better firing position (I'd allowed the British ships to get into a situation where several were blocking line-of-sight.)  Both Belleisle and Royal Sovereign, Collingwood's flagship, were forced to strike.

In the meantime, Colossus and Bellerophon had made a Bahama sandwich.


Mars and Tonnant both had damaged steerage gear and were therefore forced out of the engagement (Mars was able to make repairs quickly, but Tonnant was last seen heading over the horizon towards the Spanish coast).


Turn 6

The battering continued.  Bahama was unable to control the raging fires on board, which lead to a catastrophic explosion.

Four hours in, I decided to call it a day.

The butcher's bill was high.  The British had received just under twice as many hits as the Combined Fleet: - two ships (including the flagship) had struck and one was forced to leave the field of battle.  In contrast, a French ship had been successfully boarded and captured, and a Spanish ship was sinking.  I determined it to be a victory for the Combined Fleet.

Thoughts

A toast was made to the Immortal Memory
and to the other 4,852 lives lost in the battle

Blood, Bilge and Iron Balls has served well for what I wanted it for - an intro to naval wargaming that allows me to work out the tactics without getting too bogged down in detail.  It lacks nuance though, and I'm wondering whether to move on to something with a bit more granularity - possibly the Two Fat Lardies Kiss Me Hardy.

On 4 Nov 1805 the final action of the Trafalgar Campaign took place when Strachan's squadron caught up with Admiral Dumanoir and defeated him at the Battle of Cape Ortegal.  Perhaps by the anniversary, I will have familiarised myself with a new ruleset.  I shall have certainly have read more of Mark Adkin's excellent Trafalgar Companion - which covers far more than the title suggests.  I still have a lot to learn about age of sail tactics and placing ships where they can be most effective.

Friday, 14 October 2022

Gaming in Sep 2022


  • 4 Sep - The Beast of Errinsford (OSE) - face-to-face
  • 7 Sep - Traveller
  • 18 Sep - The Beast of Errinsford (OSE) - face-to-face
  • 27 Sep - Blood, Bilge and Iron Balls - solo wargaming
  • 30 Sep - Blood, Bilge and Iron Balls - solo wargaming

The Beast of Errinsford


The open table OSE game at our FLGS is becoming so popular again that we've made arrangements for a second table for when too many people turn up.  I volunteered to GM it and, given less than a week's notice, decide to dig out the campaign I ran online earlier in the year.  This is The Beast of Errinsford, loosely based on the module The Black Wyrm of Brandonsford by Chance Dudinack. 

Of course, in the first session the party went off in a direction that the other players never reached...  Player agency!
  • 4 Sep
Constable Ward -
my favorite NPC

The party had an ice-breaking encounter with a wild boar, entered the town of Errinsford, where they met several of the leading inhabitants (upon some of which they made a better impression than others).  There was a big info-dump (with more to come!), before an afternoon's stroll in search of the delayed caravan ended with a leathal encounter with goatmen and the desecration of bodies.  Then home for tea and XP!
  • 18 Sep
Joined by an old friend, the party continued its interviews with the townsfolk, getting madeleines and Maderia wine (and some lore) from Fr Willem the priest before deciding to head out to see Vivienne, the witch that lives in the forest.  On the way, they came across the body of an elf being devoured by giant centipedes, which managed to poison Winston the dwarf.  Vivienne got their trust by curing him and, over tea, told them about the curse that had created the original beast.  Yet another tussle with goatmen - this time they didn't desecrate the bodies, but instead fed them to the wolves.


On Day 3 of their stay in Errinsford, Derek the thief cased out the abandoned General Store, while the rest went to spoke to Riffin, the traumatised hunter who is the only known survivor of an encounter with the beast.  After picking up their packed lunch, they then headed out of the village, with the aim of getting to Sir Errin's tomb to reciover magic weapons.  They renewed their acquaintance with the local bridge-troll, who gave them directions, and had a night in the woods.  Sprites were plied with spirits.

Day 4 saw them come to the border of the marshes.  There they came across a strange shrine, which they debated robbing, but instead made offerings and petitions.  This led then the the missing Friar Dirk, who had spent the last few days in a pit after unsuccessfully trying to loot it.  Over elevenses, Dirk told his story.

Classic Traveller
  • 7 Sep

Our band of Free Traders did a bit of arms smuggling, almost immediately returning to the site of our last crime.  Contracting the Corporate goons who'd previously employed us as assasins, we were offered a black-bag job.  We very efficiently managed to exfiltrate a turn-coat scientist with minimal casualties.

Blood, Bilge and Iron Balls
  • 27 Sep
  • 30 Sep


My solo play of a version back in August of the Battle of San Domingo, 1806 at The Games Table worked out well, so I thought I would give it another go.  At the end of the first session, the rear of the French line had been forced to strike, but more damage had been done to the British van.  There was enough to call it as a French victory, with a good chance of them successfully withdrawing.  However, I thought I'd carry through on the scenario and and see if the approach of the rest of the British squadron made any difference.


In the end it didn't, the French were able to concentrate their fire as the British came into range, and ended up winning the day.

The Games Table...

Although I obviously didn't need much scenery for the BBIB game, I thought I'd share a couple of pictures of that on the neighbouring tables.  This is one of the reasons The Games Table is an excellent place to play a game.


Monday, 29 August 2022

Gaming in August 2022

 After a few month's break, I plunged back into gaming.

  • 1 Aug - Classic Traveller - face-to-face RPG
  • 3 Aug - Blood, Bilge and Iron Balls - solo wargaming
  • 5 Aug - Blood, Bilge and Iron Balls - solo wargaming
  • 6 Aug - Barrowmaze (OSE) - face-to-face RPG
  • 8 Aug - Classic Traveller - face-to-face RPG
  • 13 Aug - Blood, Bilge and Iron Balls - solo wargaming
  • 15 Aug - Blood, Bilge and Iron Balls - solo wargaming
  • 21 Aug - Barrowmaze (OSE) - face-to-face RPG

Classic Traveller
  • 1 Aug
  • 8 Aug


My first face-to-face RPG session since a Hallowe'en one-off game of 'Chill' last year.

This session was an experiment by the GM to see if there was any interest in running Classic Traveller as an open table.  Not only did he have the table-full above, but also others waiting.  As is his Old School way, everything was player-led and randomly generated.

In classic Traveller style we had five deaths in character creation (not me!) - much to the amusement of the staff at The Games Table.  

We then spent a lot of time trying to find trading opportunities, before hitching our star to a local smuggler.  During our week in hyperdrive, a great deal of speculation took place on whether our inexperienced gang of newbies could over-power the heavily-armed and experienced crew.  In the end, we went along quietly, and made a small profit on our trade goods.

Almost immediately ater hitting planetside we got hired as assasins in a corporate war.  A fortnight was spent on survellance and planning before we carried out an old-school mafia hit, gunning the exec and his bodyguards down in the street as he visited his mistress's appartment.

Blood, Bilge and Iron Balls

It's that time of year again!  With International Naval Wargaming Day (INWarD 2022) on 6 August, my mind turned to playing some solo games.  I wanted to sit down for an afternoon and do a fleet action, but first I needed to familiarise myself with my ruleset of choice - Blood, Bilge and Iron Balls.  

I've decided that I quite like BBIB.  It may be too simplistic for some, but it suits my needs nicely at the moment.
  • 3 Aug
In a single-ship action, Sir Henry Fearless of HMS Possum (74) faced-off against a Frenchman, with predictably disastrous results.


  • 5 Aug
This session was based on an engagement in which two British frigates engaged a French 74 on a lee shore.  

About an hour in, I realised that I was forgetting an important rule.  This had the effect of reducing the British firepower by 57%, but the French by only 22%.  I played on under those conditions, but perhaps unsurprisingly, both frigates had struck their colours by Round 7.
  • 13 Aug
Same as above, but now with added marines!

In the end, only one ship's marines got to fire (once), and they missed.  This was because the frigates failed to engage the 74 at close range.  After a game of long-bowls, the French managed to withdraw and complete their victory conditions.  Nevertheless, I've made a record everyone's positions and damage, and may play it as the start of a chase-engagement (a bit of a forlorn hope for the British, but we'll see).
  • 15 Aug

And I finally got the fleet action I'd planned for INWarD, courtesy of a big table at my FLGS.  Write-up here.

My version of the Battle of San Domingo, 1806, played solo over four and a half hours (refreshments were on hand!).  On this occasion, the French won.  Highlights included the collision of two British ships and the French piling fire into the confusion.

Having a big set-up at The Games Table worked very well, I will do it again.

Barrowmaze
  • 6 Aug
Regular readers will know that this is a long-term, open-table game at my FLGS.  With lockdown and me now working on Sundays, I've not been to a session since March 2020.

Six years has passed in game-time, during which time my character has been wandering the earth, preaching the Word of Solis and, in particular, telling of the Solstice Miracle that took place in our stronghold.  Unfortunately, he didn't survive this delve, but his legacy lives on.
  • 21 Aug
My new cleric turned up at the stronghold expecting to start his training, only to find his mentor dead and they weight of his responsibilities thrown on his shoulders.

We took our new boats for a spin and got lost in the marshes, ending up near what looked suspiciously like a dragon's lair and a temple occupied by a Medusa.  We beat a retreat back to the barrows we knew!


Going to the entrance we'd planned to start in, we had a successful delve, defeating a Black Pudding and finding what we hope is the key to a locked door that's been holding us up.  We then fell foul of "one more room" and had an encounter with a couple of Mummies, which left one PC dead and another comatose with Mummy Rot (we abandoned him).  

Apparently smashing the capotic jars doesn't destroy Mummies. 
*smash* *smash* *stamp* *stamp*
"Any effect on the mummy?"
"He's absolutely furious."

Friday, 19 August 2022

BBIB - The Battle of San Domingo

 Almost week late, but I finally got my big game in for International Naval Wargaming Day (INWarD '22).  

It was a solo game over four hours, using the Blood, Bilges and Iron Balls ruleset.  I don't have a convenient table at home, so put my little cardboard ships into a bag and headed down to The Games Table, who provided a mat, scenery, refreshments and BlueTac to repair damage received by the fleet in transit.


The Scenario

The scenario was a simplification of the Battle of San Domingo of 1806.  I won't give a blow-by-blow account, just some pics.


The set-up.  The French are at anchor, with some officers "conducting their business" ashore.  The British approach in two divisions.


Unsurprisingly, Brave and HMS Superb took the brunt of the damage, but the British second division headed to cut off the French retreat to the West and targetted Alexandre and Imperial in the van.  This proved a wise decision - damage to Imperial's comand chain early on, which she was unable to repair, meant that she was never able to bring the full weight of her 120 guns into action.


Superb, badly damaged, allows Northumberland to come forward and take some of the heat.


As the French van moves around the shallows, it and the westward division (now the British van)  are in close range.


A calamity!  The badly damaged Superb was unable to turn and thus collided with HMS Atlas, the two ships being entangled for a turn.  The French took advantage of this, and concetrated fire on the mess, eventually forcing Superb to strike.

Meanwhile, HMS Agamemnon finally comes within range and can join the action, further battering Brave in the French rear.  Both Brave and HMS Donegal are forced to strike their colours.


Sensing an opportunity, Alexandre turns to board Canopus!


The boarding is successful, and Canopus is captured.  Sensing that the British attack has lost its momentum, the French withdraw to the West.  

While the eventual fate of Alexandre and Canopus remains undertermind, Imperial and Diomede certainly escape, which - with the damage inflicted on the surviving British ships - is enough for me to declare a French victory.


Wednesday, 3 August 2022

Sir Henry Does it Again! Possum and Carcajou


Sir Henry Fearless, RN

Following the disastrous engagement in which he lost his ship without firing a shot, it seemed likely that Sir Henry Fearless would spend the rest of his career drilling Fencibles in one of the soggier corners of Lincolnshire.  However, two things stood in his favour: first, his cousin, Lord Sandicote, controlled four rotten boroughs and, secondly, Lady Sandicote was sleeping with the First Lord of the Admiralty.  Consequently, when Sir Henry's court martial convened, he was not only exonorated before lunch but also received a commendation for his action.

Nevertheless, both the Navy and his family agreed that the best place for Sir Henry was "As far away as possible!"  He was accordingly given command of the aged HMS Possum (74) with orders to sail to New South Wales and remind the Lobsters running the Colony that they were dependent on the Navy's good will.

However, it's a long way from Portsmouth to Australia, and even Sir Henry can't avoid every encounter...

It's that time of year again!  With International Naval Wargaming day on Saturday, my mind has turned to playing some solo games.  Ideally, I want to sit down for an afternoon and do a fleet action, but first I need to familiarise myself with my ruleset of choice, Blood, Bilge and Iron Balls after a break of over two years, so am going to start with some simpler actions.

Set-Up

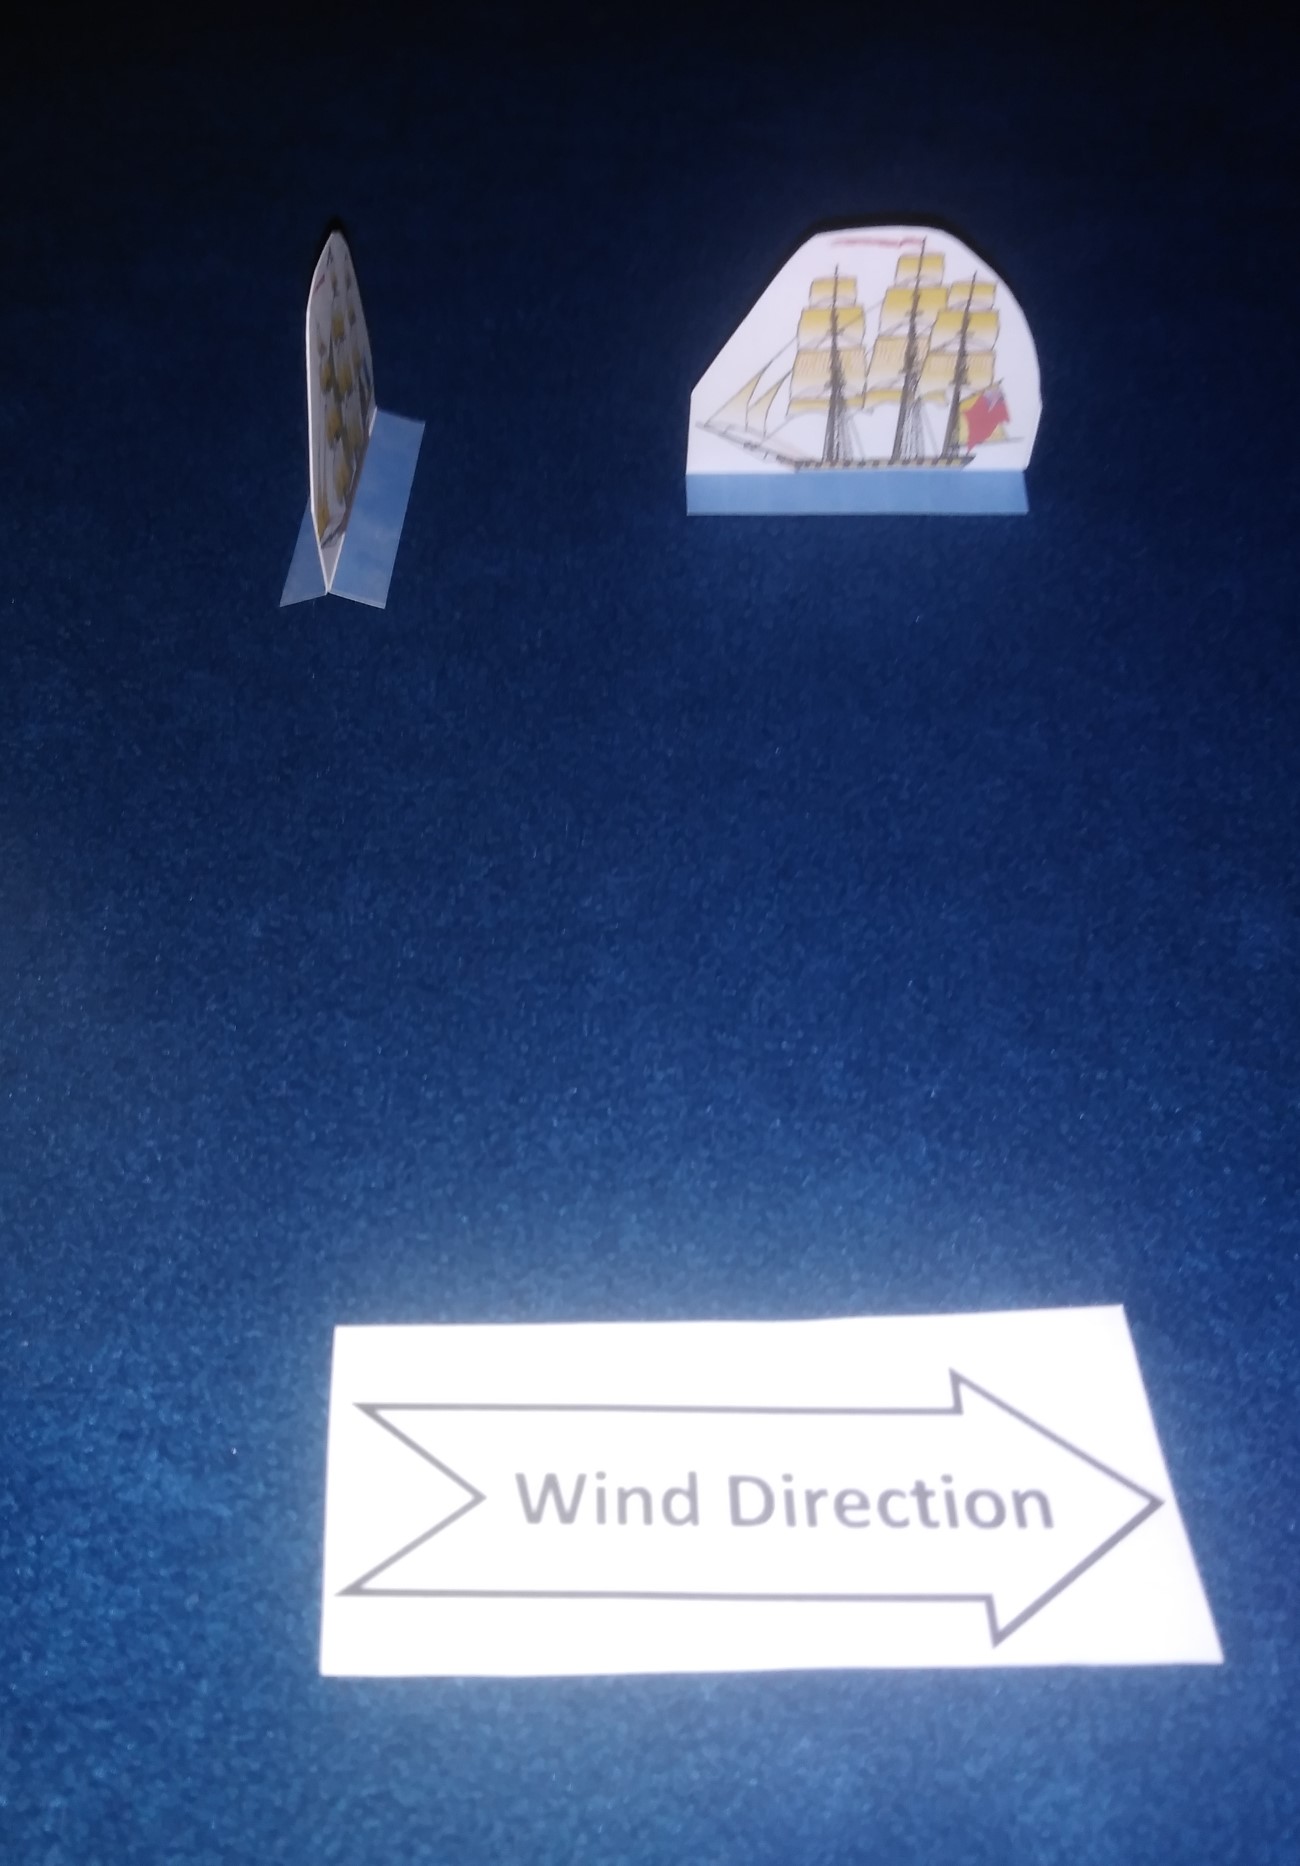
Using a 30x47inch table, wind direction, the position of both ships and their headings were determined randomly.

It resulted in a very interesting situation, which promised a short, sharp and bloody encounter!


As dawn broke and the early morning mist lifted, Lt Hapless, the officer of the watch, had a nasty shock.  A French 74 had positioned itself into close range and was in position to rake Possum!  If the lookout survived the day, Hapless would have the skin off his back!

Immediately, he gave the order to beat to quarters and sent a marine to summon a bleary-eyed Capt Fearless.

I notice that in between the initial set-up and taking the second photo, I inadvertently reversed the direction of the wind.  It stayed in that direction for the rest of the engagement.

Round One

  • British Fire
  • French Sailing
  • British Repair
  • French Repair
  • French Fire
  • British Sailing
Fearless was unable to bring any guns to bear on the Frenchman - he could clearly make out the ship's name as Carcajou.  Fortunately, the enemy seemed to have been taken by surprise by the fog's lifting and missed the chance to rake Possum.  Nevertheless, at this range, the belated broadside was devastating.  In addition to hull and steerage damage, a fire immediately resulted in a major explosion, causing an inferno that incapacited most of the starboard gun crews.


I could have brought Carcajou to a full stop during the French sailing phase, which would have allowed for a raking shot, but there was no guarantee that the French would be able to fire before the British sailing phase, and I didn't want to loose manoeuverability.  

The French broadside scored major damage - six out of seven die scored hits.  Damage cards included the red joker (an explosion), which meant that a further five cards were drawn.  These included the black joker (an inferno).  In total, three crew stars were wiped out (from a total of seven), the hull was damaged and five of the seven gun positions on the starboard side were lost.  Significantly, the steerage gear was also damaged, restricting Possum's manoeuverability.

Damage was allocated randomly between port and starboard guns - as would have been the case with a raking shot - with five points to starboard and one to port.  Looking at the above photo now, I wonder if it shouldn't have been allocated to the port guns, which would have made a significant difference to the rest of the encounter.

Ruling out an attempt to circle so he could engage to port, Fearless brought the ship around to bring what was left of the starboard guns to bear.


It wasn't until the next round that I realised that until repairs were made to the steerage gear, Possum shouldn't have been able to turn at all.  But this is why I need a refresher!

Round Two
  • French Repair
  • French Fire
  • British Repair
  • British Fire
  • French Sailing
  • British Sailing
After such a devastating opening broadside, Fearless' only chance was to conduct some swift repairs and get into position to open fire before the French followed-up.  He according sent Lt Hapless to muster repair crews.  Before they could start work, Carcajou unleased another volley of fire, and Hapless looked around hopelessly as his repair crew were mown down by grape-shot.  With the few remaining men, his attempts at fire-fighting were futile.

The French scored another six hits out of seven, wiping out another crew star, two more guns and further damaging the steering gear.  With only one crew star left, Hapless could only muster a single repair crew.

After his pervious experince, Fearless was determined that it shouldn't be said that he'd given up without a fight, and urged the depleted starboard batteries to open fire.  If all else failed, he would ram the Frenchman!

With the damage to starboard guns, Possum only had the roll of a single d6 - and got a Natural One!

Round Three
  • British Repair
  • British Sailing
  • French Repair
  • French Sailing
  • British Fire
  • French Fire


Realising that the French were attempting to position themselves for a raking attack and desparate for manoeuverability, Fearless ordered Hapless to ignore the fires and attempt to repair the steerage gear.  Even with the assistance of Mr Bates, the Sailing Master, Hapless's crew we unable to make any progress.

Unable to achieve the raking position, Carcajou closed range and trusted in the superior weight of shot that it could bring to bear.


This was a gamble, as even Possum's gunners couldn't miss at this range.  A hit caused hull damage, but more significant was the fire from the section of Marines in the guntops, targeted on the Gunner's crew.

The decrease in range wasn't significant - but Possum finally scored a hit with its one dice.  It was at this stage that I reaslised that as we'd been in Close Range for the whole engagement, the Marines could have been doing their thing from the begining.  Another lesson learnt! 

But weight of shot counts in the end, and Carcajou was able to fire a full broadside, causing more hull damage and bringing down a mast.

Carcajou is rolling seven dice as compared to Possum's one.  In this firing phase it scored four hits.


Round Four
  • French Sailing
  • British Sailing
  • French Fire
Another broadside from the French caused massive damage.  Fearless looked around him: - there were massive crew losses, one mast was down, half the guns were out of action (with none at all able to bear on the Frenchman).  He had no choice but to strike his colours.

The Lincolnshire Fencibles were out of the question now.  He'd be cashiered and have to retire to Norfolk and politics.

Even without his guns knocked out, Fearless had to strike - his final crew star had been wiped out, Possum was lost.

Historical Note

Midshipman Poop-Decker and friend

Possum vs Carcajou is a minor engagement, and would be (gratefully) forgotten by most naval historians were it not for the fact that serving on HMS Possum was a midshipman (soon to be appointed Acting Lieutenant) in his first action.  This was Albert Poop-Decker, later to be famous (as Rear Adm Sir Albert Poop-Decker) as one of the first (and, to date, the oldest) recipients of the Victoria Cross for his actions before the guns of Sevastopol.